
Drying removes the water from freshly cut flower. Curing stabilises what is left inside the bud once dry, and refines both the aroma and the smoothness of the smoke. They are two separate processes, with separate parameters, and a good share of quality problems come from treating them as one, or from rushing the first to get to the second sooner.
The harvest reaches the drying space with most of its weight in water. From that point on, every decision shapes the final result: a fast dry at high temperature strips terpenes and leaves a vegetal smell that curing will never fully correct.
What curing cannabis is and how it differs from drying
Drying aims to bring the water content of the flower down to a point where it stops being a favourable medium for fungi and bacteria, and it does so slowly and evenly. It ends when the bud is dry on the outside and still holds some moisture inside.
Curing begins immediately afterwards, in a sealed container. Inside the jar, the moisture still held at the centre of the bud migrates towards the surface and the water content evens out across the whole flower. In parallel, residual chlorophyll breaks down, which is what causes the green taste and the harshness in the throat, and low molecular weight volatile compounds that taste rough when fresh evaporate. The result is a smoother smoke and a more defined aromatic profile.
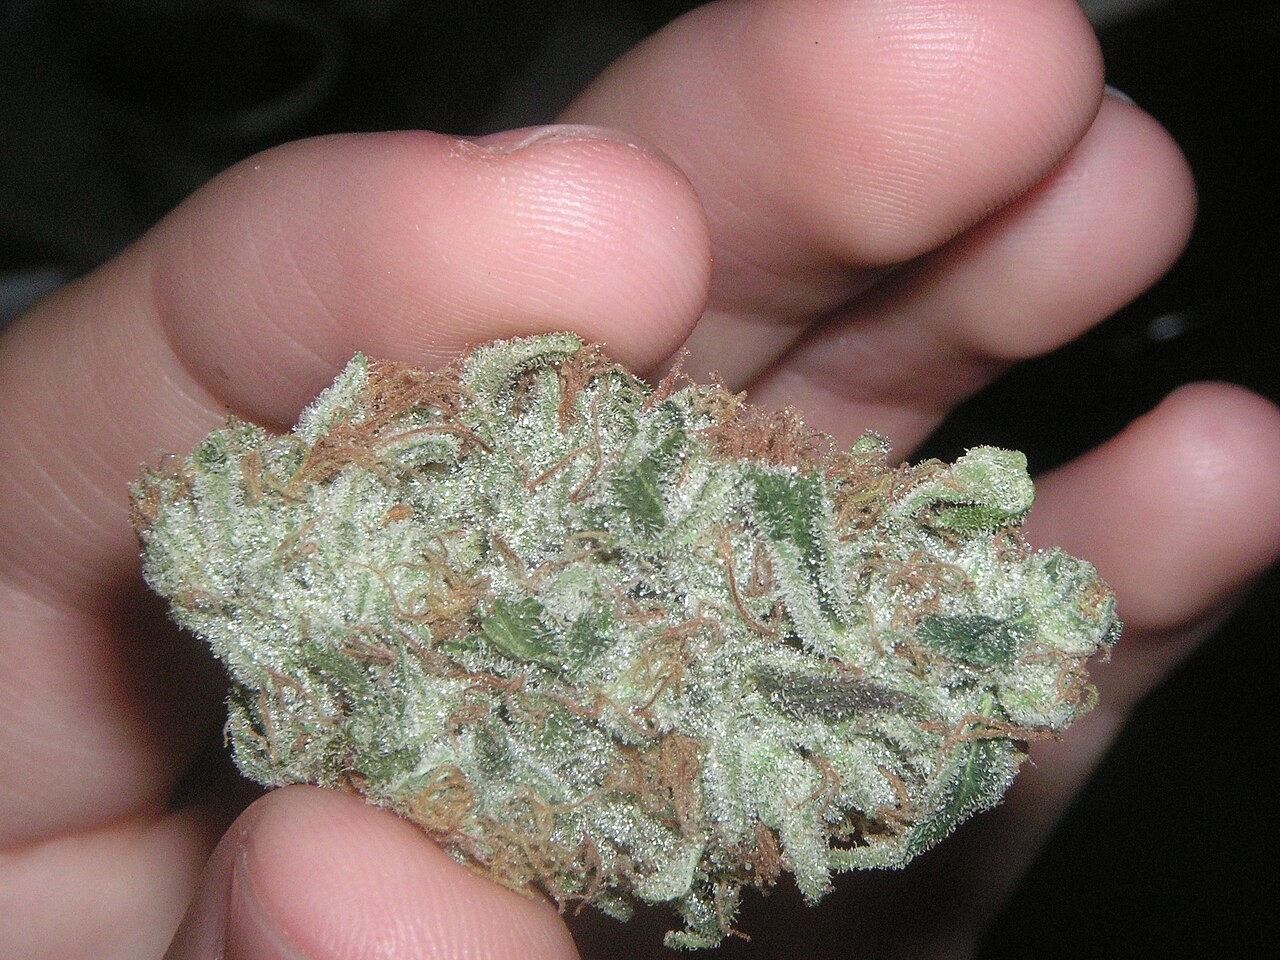

One point worth clearing up: cannabis decarboxylation does not happen during curing. Curing acts on chlorophyll and aroma at room temperature, whereas converting acidic cannabinoids into their neutral form requires sustained heat.
The harvest point falls outside this guide. Trichome colour and the exact moment to cut are covered in the article on when to harvest cannabis, and it is worth settling before setting up the drying space, because flower cut in a hurry cannot be fixed later.
There is one exception to all of the above. If the harvest is destined for fresh extraction, the material is not dried at all: it goes straight into the freezer as soon as it is cut, in what is known as fresh frozen. In that case neither drying nor curing comes into play, and the logistics of the harvest change completely.
Dry cannabis leaves: trimming before or after drying
The first decision is whether to remove the leaves while the plant is fresh or once it is dry. There is no correct option independent of the environment, because what is really being chosen is the speed of the dry.
Wet trimming, meaning removing both large and small leaves right after cutting, speeds up the process and reduces the risk of mould. It is the logical choice in humid environments, with dense buds, or when the drying space has little dehumidifying capacity. The trade-off is that the flower is exposed from day one and loses moisture faster, with more terpene loss.
Dry trimming means hanging the branch with the leaves still on and trimming once it is dry. The leaves act as a moisture reserve and a brake, the dry is more gradual and the resin is handled less. It is the right choice in dry environments or with small, airy buds. It demands more space, more time and a more awkward trim, because dry leaf crumbles and sticks.
A middle path works well in most situations: remove the large leaves while fresh, since they carry plenty of water and nothing of interest, and leave the small ones wrapping the flower to trim at the end.
What to do with the trim
Trimming produces two distinct materials and it pays to separate them from the start. Large leaves with no visible trichomes have no use and go to waste. The small leaves wrapping the flower do carry resin and are the usual raw material for solventless extraction. That material allows two routes: store it dry and cold to work later through ice water extraction, or press it with heat to obtain rosin. Fresh trim can also be frozen at the moment of trimming if ice water extraction is the destination.
Hygiene when handling
All handling should be done with clean hands or gloves, and with disinfected scissors. Beyond hygiene, buds should be touched as little as possible and always by the stem: every handling knocks off trichomes and compacts the flower.
How to set up a cannabis drying room
The drying space does not need to be a dedicated room, but it does need to meet four conditions: darkness, stable temperature, humidity control, and air movement without a direct draught over the flowers. Light degrades cannabinoids and terpenes, so the space should stay closed and only be opened to check.
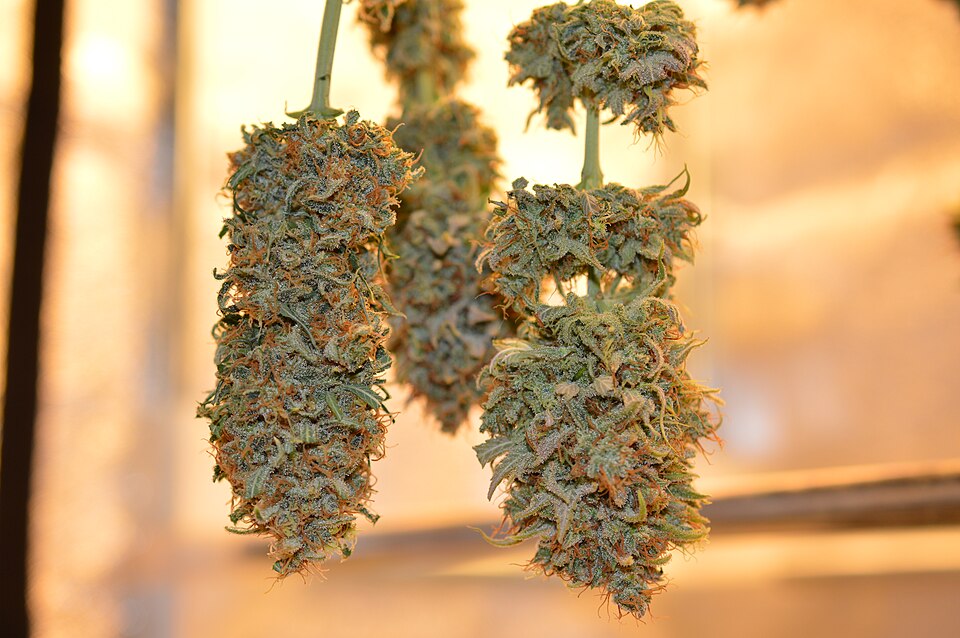
As for hanging format, there are three options and they suit different situations. The whole plant upside down is the slowest dry and the safest in dry environments, although it needs height and makes air circulation between branches harder. Hanging by branches is the usual format and the most balanced: it allows spacing them out, checking and adjusting density. Loose buds on mesh is the fastest option and the one that takes up least height, useful when speed is needed, with the drawback that they have to be turned so they do not flatten on one side.
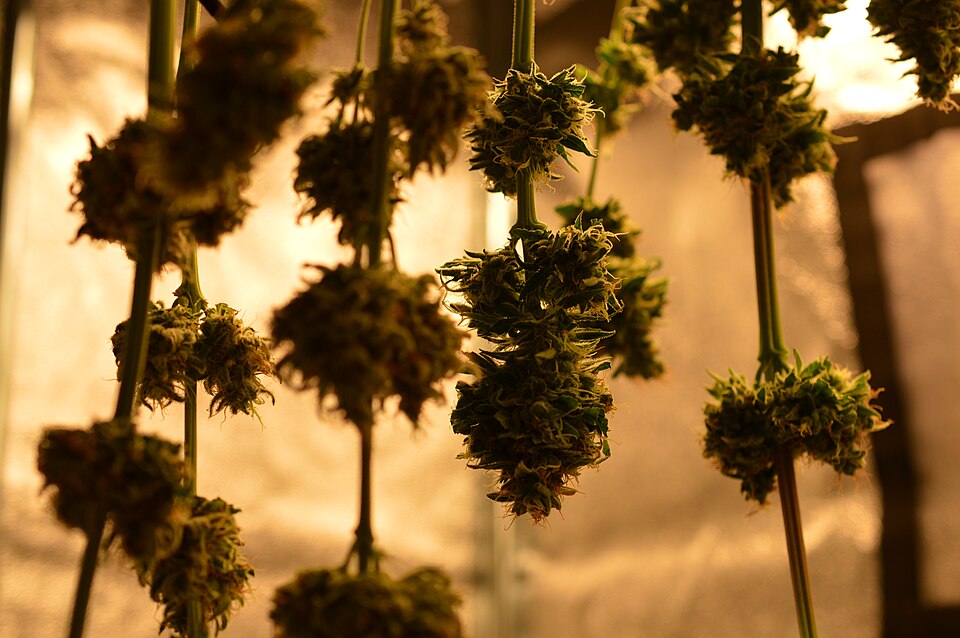

Load density matters as much as the parameters. A large harvest in a small space raises the humidity of the air on its own during the first few days, and no temperature adjustment compensates for that without a dehumidifier.
Smell during drying
The first days of drying are the point of highest odour emission in the whole cycle, above flowering. If the space shares ventilation with living areas, the carbon filter has to keep running through the dry rather than being switched off at harvest. The article on discreet indoor growing covers odour control in more detail.
Where to place the humidity meter
The hygrometer in the jar controls the cure, but drying needs its own reading and many problems come from not having one. The meter in the drying space should sit at the height of the hanging material and in the centre of the space, not against the wall, not next to the air intake, and not on the floor, where the reading does not represent what is happening around the flowers.
In large harvests more than one measuring point is worthwhile. Humid air gathers in the lower zone and heat in the upper one, so the difference between the top and the bottom of the drying space can be several points of humidity and explains why some branches run well ahead of others.
Drying cannabis: temperature, humidity and ventilation
The working range sits at around 18 to 21 °C (64 to 70 °F) with a relative humidity of 55 to 62%. The figure on its own says little: what governs the rate of evaporation is the combination of the two, so 20 °C at 50% humidity dries much faster than 20 °C at 60%.
Above 22 °C (72 °F) the dry accelerates, and from 24 °C (75 °F) the most volatile terpenes are lost and the surface of the flower closes up before the interior has released its water. Below 15 °C the process stretches out so far that the risk of fungi climbs sharply, especially if humidity comes with it.
Ventilation should renew the air in the space, not blow over the buds. A fan pointed directly at the flowers creates the most common drying defect: crisp outside and damp inside. Air needs to move underneath and around the hanging material.
| Phase | Temperature | Relative humidity | Indicative duration | Signal to move to the next phase |
|---|---|---|---|---|
| Drying |
18 to 21 °C (64 to 70 °F) |
55 to 62% | 7 to 14 days | A thin stem snaps when bent |
| Active curing |
18 to 21 °C (64 to 70 °F) |
58 to 62% inside the jar | 2 to 4 weeks of burping | Jar humidity holds steady without opening |
| Storage | Cool and stable, without swings | 58 to 62% inside the jar | Indefinite | Not applicable |
Cannabis drying time and what dry cannabis looks like
With the parameters above, drying usually completes in 7 to 14 days. Under five days indicates the environment is too dry or too warm and that the loss of aroma will be noticeable. Beyond three weeks calls for daily checks, because the risk of fungi appearing grows with every additional day.
The classic test is bending a thin stem: when it snaps rather than bending, the dry is done. It works well, but it is worth checking against other signals, because in large buds the main stem can still be flexible while the flower is already at its point, and in small buds the snap arrives once the flower is already past it.
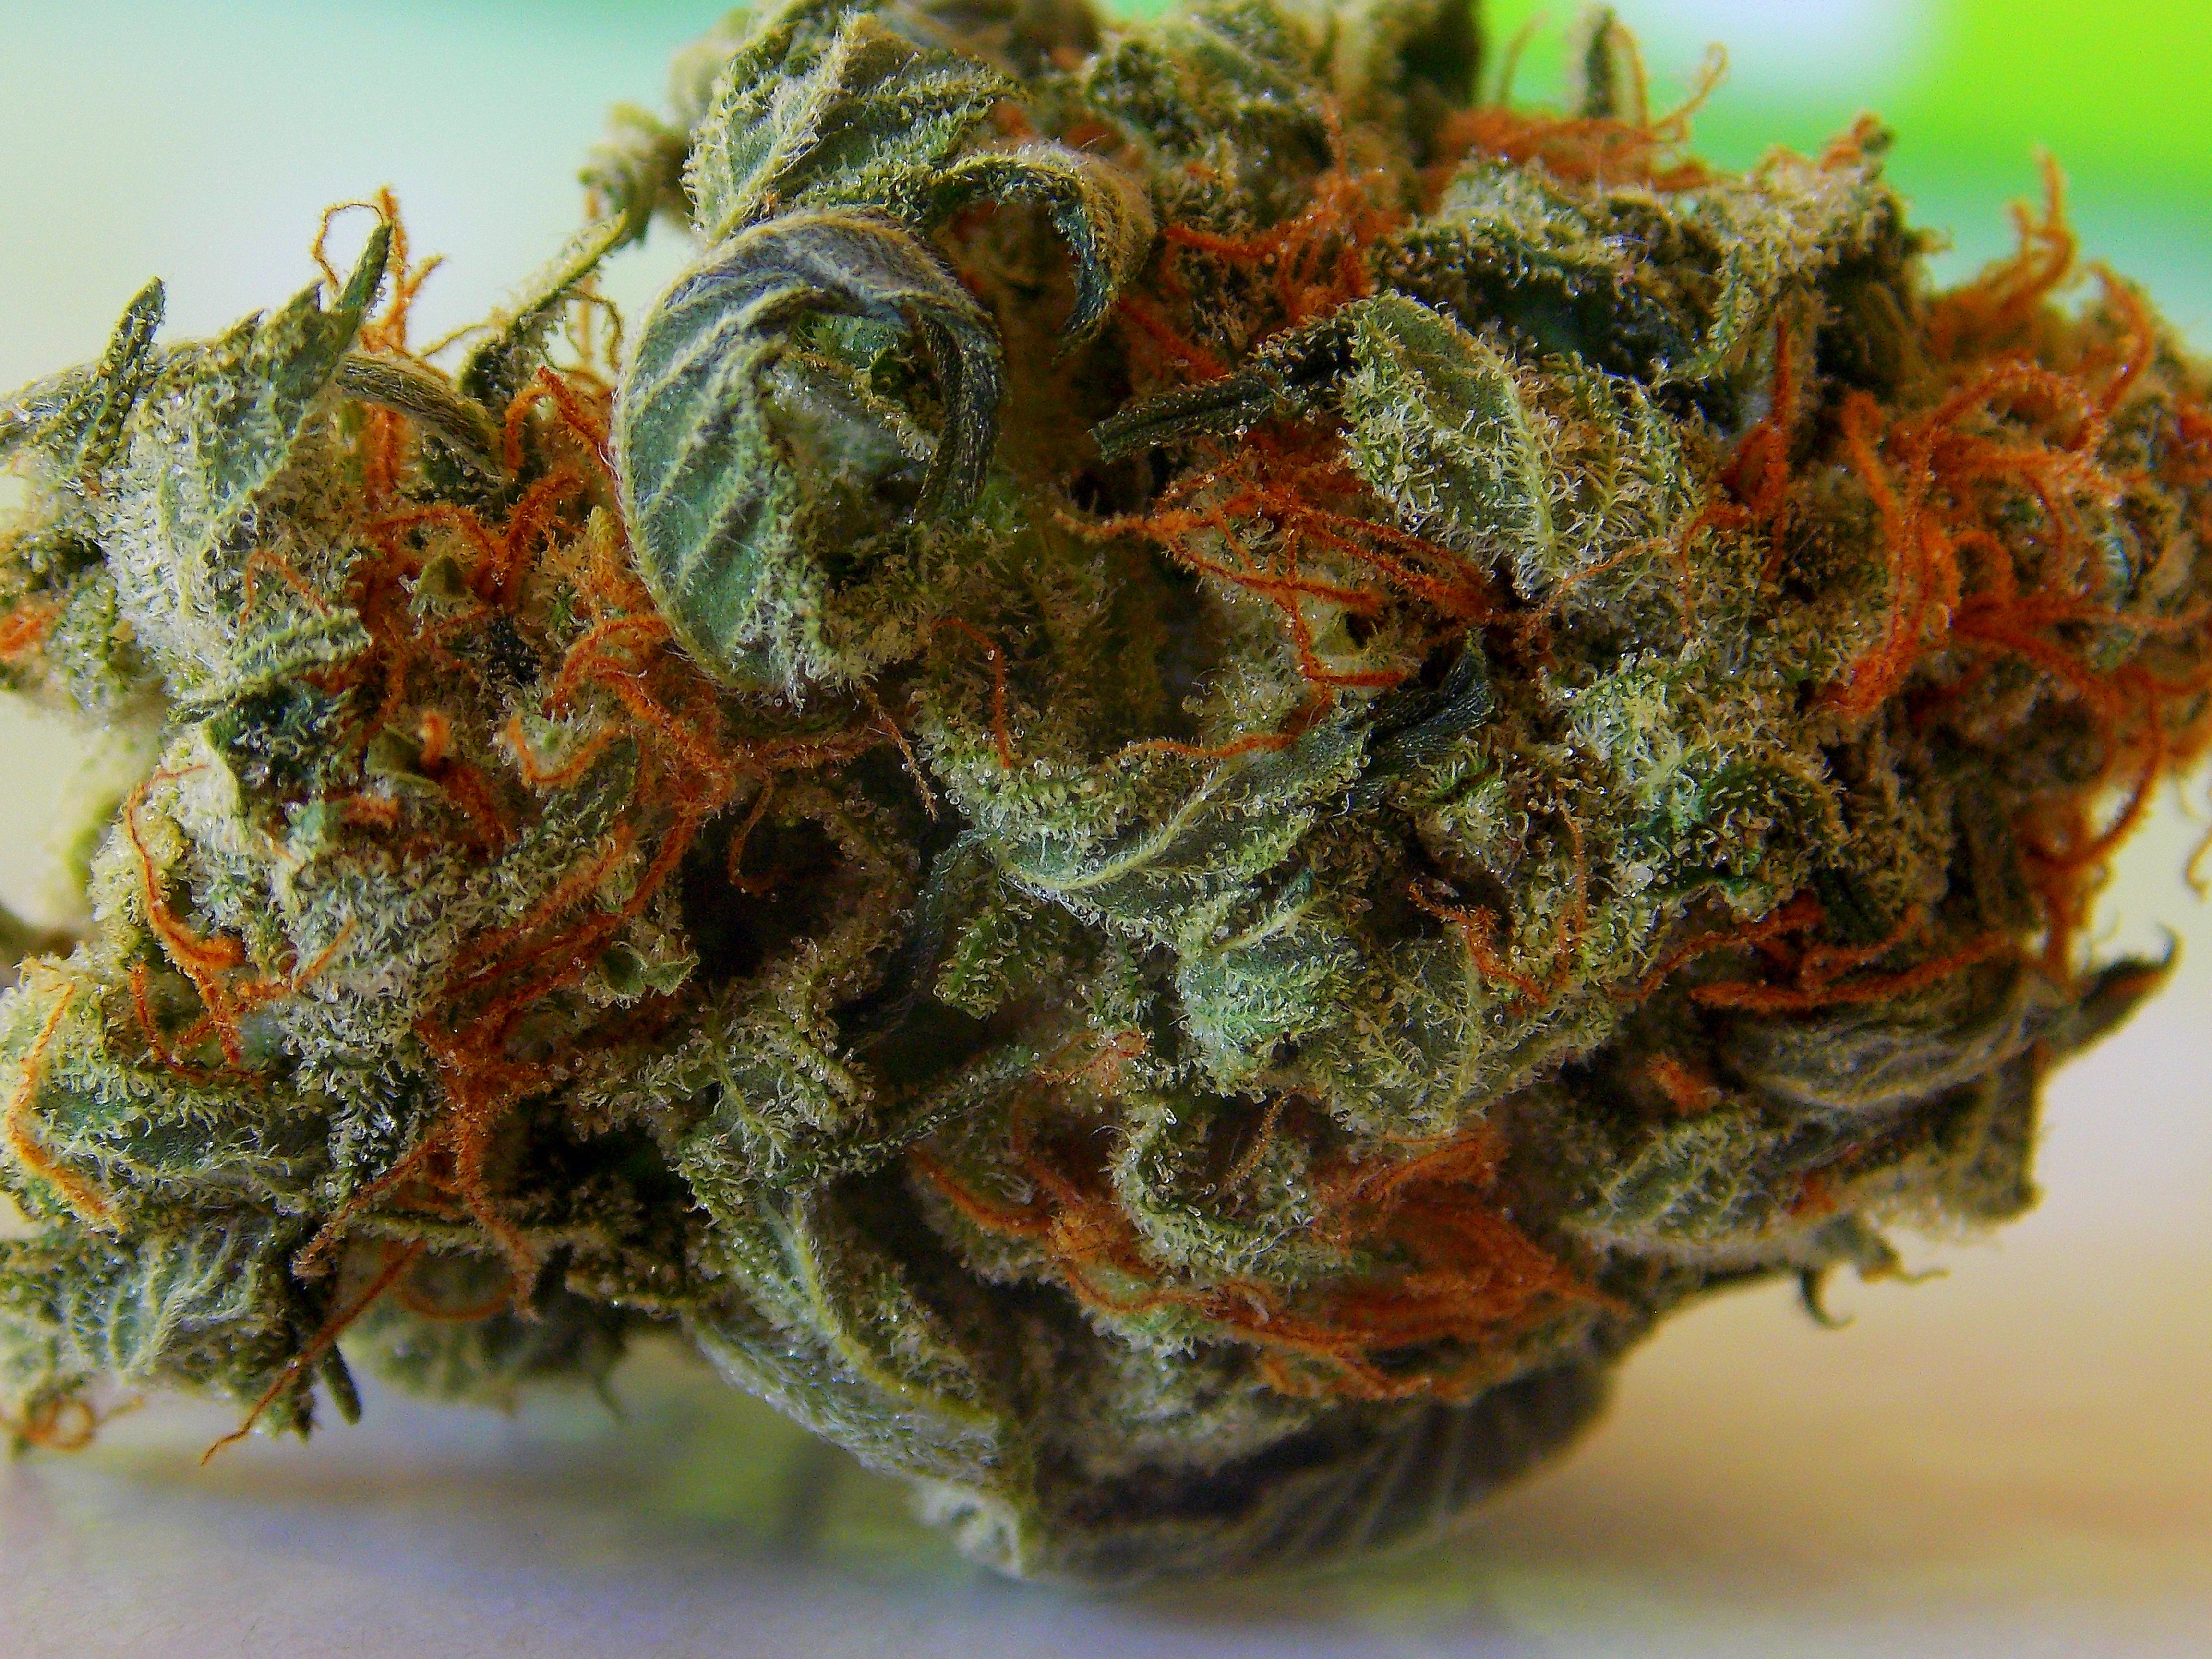
Properly dried flower feels firm and slightly springy when pressed, and recovers part of its shape when released. The small leaves around the bud break easily, the surface is dry to the touch but the bud does not powder between the fingers, and the smell is no longer vegetal or grassy. If it falls apart into dust when squeezed, the dry has gone too far.
How to cure cannabis step by step
Curing starts once drying is finished and consists of placing the flower in an airtight container and controlling its humidity over several weeks through openings.
- Fill the container to around three quarters of its capacity, without compressing. The flower should move when the jar is turned.
- Place a small hygrometer inside the container. It is the only objective control in the process.
- During the first week, open two or three times a day for ten to fifteen minutes. Saturated humid air leaves and dry air comes in. If the reading climbs above 65% after closing, the flower held more water than expected and the openings need to be longer.
- During the second week, open once a day for a few minutes.
- From the third week, open every two or three days if humidity stays steady between 58 and 62%.
- When the reading settles on its own over several consecutive days without opening, active curing is finished and the container moves into storage.
The hygrometer reading needs time to equalise. After the jar is closed, the value climbs for hours before stabilising, so there is no point interpreting a reading taken five minutes after closing.
If the flower went in too dry, humidity control packs calibrated at 62% return water in a controlled way. Adding fruit peel, bread or any other plant material is a bad idea: they release moisture without control, transfer aromas and carry spores into a sealed container.
Cannabis curing and drying boxes: which container to use
The container should be airtight, opaque or kept in darkness, and made of a material that neither gives off odour nor absorbs resin. The wide-mouth glass jar with an airtight seal is the standard for practical reasons: it adds no flavour, it lets the contents be seen and it cleans well. Food-grade stainless steel works just as well and offers better protection from light.
Plastic boxes and containers only work if they are rigid food-grade plastic with a genuine airtight seal. Soft plastic and bags are ruled out: they do not really seal, they build up static that strips trichomes and over time they transfer odour.
On size, a container that ends up reasonably full is preferable to a large one left half empty, because excess air slows down stabilisation. The opposite extreme is no better: compressed flower does not exchange moisture evenly and gets crushed.
How long curing takes and when cured cannabis is at its point
Two weeks of curing already produce a noticeable improvement in smoothness. The clearest change tends to appear between the third and sixth week, when the aroma stops being flat and the nuances of the variety come through. Beyond that the improvement continues more slowly and reaches a point where the profile settles and all that is left is to store it well.
The sign that curing is on track is not the time elapsed but the smell on opening: it should be clean and characteristic, with no trace of cut grass or any sharp note. A perfect cure is not the longest one, but the one where humidity stayed in range throughout and there was never an odd smell.
Common problems when drying and curing cannabis
Almost every failure shows up through smell and touch in the first weeks, and most can be corrected if acted on early.
| Symptom | Probable cause | Correction |
|---|---|---|
| Smell of hay or cut grass | Dry too fast or too warm, chlorophyll not broken down | Extend the cure. It improves partially and does not always disappear |
| Ammonia smell when opening the jar | Excess moisture and anaerobic decomposition | Empty the container, spread the flower on mesh for several hours and restart with long openings |
| Crisp outside and soft inside | Uneven dry, often from a direct draught of air | Seal in a jar and let the moisture equalise, with frequent openings the first few days |
| The flower powders when touched | Over-dried | Rehydrate with a 62% humidity pack. Texture recovers in part, lost aroma does not |
| Grey or whitish patches, stale cellar smell | Mould | Discard the affected material. It cannot be recovered or consumed |
| Jar humidity does not drop despite the openings | The flower went in before the dry was finished | Return it to the drying space for a day or two and restart the cure |
The risk of botrytis does not end at harvest. Dense flower remains a favourable medium during the first days of drying, and an infection that went unnoticed on the plant shows up in the drying space as a brown, dry core inside an apparently healthy bud. Checking the thickest buds internally is worth doing, particularly with outdoor material. Identification and prevention are covered in detail in the article on fungi in a cannabis grow.
Drying and curing according to climate and grow size
The ranges above describe a controlled environment. When the drying space depends on the outside climate, the priority changes depending on which extreme applies.
Heat and high humidity
This is the hardest combination, because heat accelerates degradation while humidity stops the flower releasing water. The order of action is to bring humidity down first and temperature after, never to compensate with more ventilation, which only moves equally humid air around. Above 70% ambient humidity a dehumidifier stops being optional. It is also worth trimming wet, spacing the branches well and reducing the load per cubic metre.
Cold and high humidity
The dry stretches out and mould arrives before the flower is ready. The solution is gentle heat to bring the space to around 18 °C (64 °F), always with indirect warm air and never pointed at the flowers, combined with dehumidification. Without both at once, raising the temperature alone solves nothing.

Dry environments
With ambient humidity below 45% the problem is the reverse: the flower dries in a few days and loses aroma. Here the aim is to slow things down. Hang the whole plant untrimmed, cut air renewal to the minimum needed, humidify the space and, if the process is running too fast, move to the jar slightly earlier than planned and let the cure finish equalising the moisture.
Bud density is decided before harvest
Flower structure is not something found at harvest: it comes with the genetics. Compact-budded varieties dry more slowly, hold moisture inside and are the most exposed to botrytis, while airier ones dry more evenly and forgive a humid environment. In climates with persistently high humidity, choosing genetics with a less dense structure solves at the point of purchase a problem that is very hard to manage with equipment later.
Small grows and large grows
In harvests of a few plants, the grow tent itself, switched off, works as a drying space: it is dark, it has adjustable extraction and a filter already fitted. It is enough to turn the extractor down to minimum and watch the humidity, which will rise noticeably in the first days.
In large harvests, the water load the fresh material brings in dominates the environment of the space and forces the equipment to be sized accordingly. Checks become daily and by sampling at different points of the drying space, because branches at the top and at the bottom do not progress at the same rate.
Outdoor material
Outdoor flower enters the drying space with a higher microbial load and, depending on when it was cut, with surface moisture from dew or rain. It is worth letting it drain and air out for a few hours before hanging it, and stepping up the internal checks on the most compact buds during the first week.
Storage after curing
Once curing is finished, the flower is kept in the same type of airtight container, in darkness, at a cool and stable temperature. Temperature swings do more damage than a constant higher value, because they cause condensation inside the jar. For that reason it is not a good idea to keep containers in places that are opened and closed often with a change of temperature.
If seeds appear in the harvest, they should be separated before the flower goes into the jar. Curing conditions, with humidity at around 60%, are exactly what does not suit their long-term viability, which calls for drier and colder storage. The procedure is covered in detail in the article on storing cannabis seeds.
Frequently asked questions
When is weed dry enough to cure?
When a thin stem snaps rather than bending, and the bud stays firm without powdering between the fingers. Breaking one of the thickest buds in half is the check that settles it: the texture inside should match the outside, with no soft or damp areas and no change of colour at the core. A darker, softer centre, or one that smells different, points to an incomplete dry or the presence of fungi, and going into a sealed jar in that state is what produces an ammonia smell a few days later.
How long to dry weed before curing?
Seven to fourteen days under the parameters above, and ten to fourteen for dense buds. Under five days means the environment is too dry or too warm and the loss of aroma will be noticeable. Beyond three weeks the dry needs daily checks, because the risk of fungi grows with every additional day. Bud size and density are the main variable: a compact bud holds water at its centre well after the surface is dry, which is why the stem test alone is not enough on large flowers.
Why is curing weed important?
Because it removes the harshness that a freshly dried flower still carries. Residual chlorophyll breaks down, which is what causes the green taste and the throat irritation, and the rough low molecular weight volatiles evaporate. It also evens out the water content across the bud, so the flower stops being crisp outside and damp inside. What curing does not do is increase potency: the amount of cannabinoids stays the same, and the gain is in aroma, smoothness and the preservation of what an aggressive dry would otherwise degrade.
How long to cure cannabis?
Two weeks produce a noticeable improvement, and the clearest change lands between the third and sixth week. Beyond that the profile keeps improving more slowly until it settles, and all that is left is to store it well. The sign that the cure is on track is not the calendar but the smell on opening: clean and characteristic, with no trace of cut grass or any sharp note.
Can you cure cannabis at 50% humidity?
No, 50% is too dry and the flower will over-dry inside the jar. The working range is 58 to 62%, measured with a small hygrometer kept inside the container, and it takes hours after closing for the reading to settle, so a measurement taken five minutes after sealing means nothing. If the flower went in below that range, humidity control packs calibrated at 62% bring it back in a controlled way. Curing without a hygrometer is possible but means working blind: the only criteria left are how the flower feels on opening and whether it has clearly softened by the next day.
What humidity level for drying weed in a very humid environment?
The target stays at 55 to 62% relative humidity, which in a humid climate means a dehumidifier rather than more airflow. Increasing ventilation without dehumidifying does not work, because the incoming air is just as saturated. Trimming wet reduces the amount of water the space has to handle, and spacing the branches improves circulation around each one. Above 70% ambient humidity the dehumidifier stops being optional.
How much weight does cannabis lose when drying?
Most of the fresh weight is water, and the range usually quoted puts the loss at between 70 and 80%, though it is worth taking that as guidance rather than a figure to aim at. The real loss depends on the density of the flower, how much leaf was left on at hanging, when it was cut and how recently it was watered. A plant cut with freshly watered soil and hung whole without trimming loses far more weight than the same plant trimmed wet. That is why comparing a final weight with another grower's says little: the only useful comparison is between your own harvests under similar conditions.